


The Challenges of Building a Dalek: Part 2
If you haven’t read The Challenges of Building a Dalek: Part 1, I would strongly suggest that you do. Picking up from where I last left off; we are still working on the base of the dalek. As we want to make the base is almost near a hundred percent completed before getting the next section started. As it’s too far to reach inside once the next section is on.
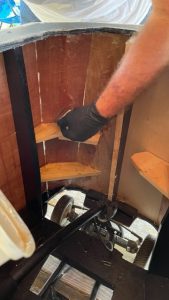
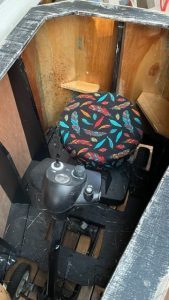
After re-slanting the front four panels we realized how weak the joint was between each panel. To help fix this problem we decided to reinforce the panels from the inside with a few layers of fiberglass. After this dried, we immediately noticed and took note of how much strong it is now. Though we decided to reinforce where the sides meet the base on the inside as well. During this process, we figured it was time to add some cushion to the seat inside and make it a little more comfortable for dad when he sits inside. Dad is still trying to figure out where to add the cupholder and phone basket.
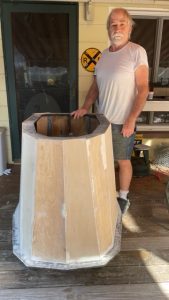
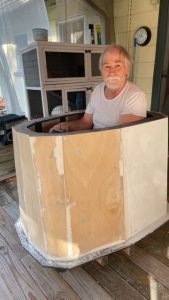
After watching multiple dalek episodes and looking at multiple pictures, we noticed that daleks have a slight skirt and that is also at an angle. And at this, dad makes a joke that the dalek is Scottish. It’s not a skirt but a kilt. And because he is Scottish, we are thinking of renaming him McDerek the Dalek. The next few days, dad is sanding the outside to make it as smooth as possible so when we do paint it, the dalek will look seamless.
The Shoulders
For the next section; the shoulders or in other words the gun mounts; we are starting the challenge of converting the measurements. As I said in part one, that has been one of our biggest challenges even before we started the build process. Before building; we had decided to convert the measurements as we go along. So that we don’t mess up or in our case change the original dimensions. Since we have tweaked our measurements so many times, we are getting slightly stuck in a few places. Although we have a rough idea of those measurements; according to the plans, the next piece should be 16 inches tall (1.5 millimeters).
Current Design
Currently, the base alone is standing at about 36 inches (81 millimeters), which includes the wheels. We are still expecting to finish by May and still have no idea what the color scheme will be. All the steps we are taking for the base will be good practice for when we eventually do the head of the dalek; which is completely fiberglass. This project has encouraged dad that he already wants to make another dalek, but bigger and the original size.